Curious about how to do ombre nails? We have got you covered. The Instagram nail art videos are oddly satisfying and make you want those perfect nails and they are indeed such a beauty. The ombre effect is quite a tricky artwork, and you may want the assistance of an expert if you are a beginner . But did you know that you can master this art from the comfort of your home? We have compiled a list of uber-easy DIY nail art tutorials along with 5 beautiful designs. You can create them with or without sponges. So, indulge your inner artist and get ombre gradient nails at home. Swipe up!

- Sponge Wetness: Make sure that the sponge is neither too dry nor too wet. The former may lift and chip off the base coat while it may run down in case of the latter.
- Colors: Pick colors that are adjacent on the color spectrum. It’s better to be subtle than stark.
- Nail Length: Ombre nails can make your nails look small. Grow your nails a bit before you try this style.
In This Article
How To Do Ombre Nails: Step-By-Step Tutorial (Pictures)
If you are a beginner, it is best to start with the original French ombre. The difference between a French manicure and a French ombre is that the white nail tips gradually diffuse into the flesh or a nude base instead of a stark distinction between the white nail tip and the nail base. This technique may sound intimidating, but you can easily do it with this step-by-step tutorial (with pictures). Swipe up!
What You Need
- Base coat (clear nail polish)
- White nail polish
- Nude or flesh-toned nail polish
- Liquid latex tape
- Nail polish remover
- A small brush or a Q-tip
- Disposable makeup sponge
- Top coat
Step 1: Apply The Base Coat
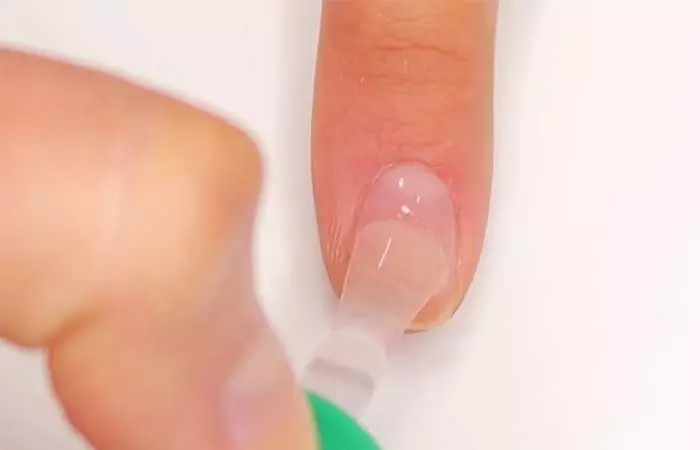
Image: YouTube@yanairbe
Start with manicured nails. Apply the base coat to protect your nails and let them dry.

Step 2: Apply The Nude Or Flesh-Toned Nail Polish
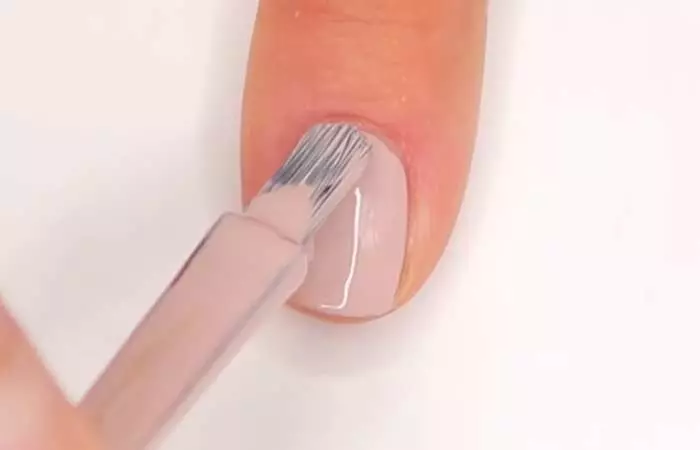
Image: YouTube@yanairbe
Apply two coats of nude or flesh-toned nail polish and let it dry.
Step 3: Apply The Liquid Latex Tape To The Cuticles
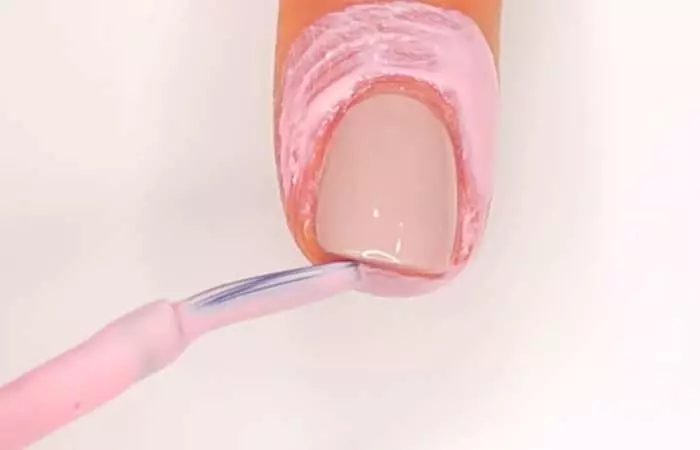
Image: YouTube@yanairbe
Apply the liquid latex tape around your nails. It protects the skin from the mess and peels off easily. Wait for it to dry before moving on to the next step.
Before applying the liquid latex tape to your cuticles, consider applying a nourishing cuticle oil to keep your cuticles healthy and hydrated. This extra step will not only protect your skin but also promote nail health and a cleaner nail application process, making the nail polish last longer and keeping the polish shinier as well.
Step 4: Apply The White Nail Polish To The Sponge
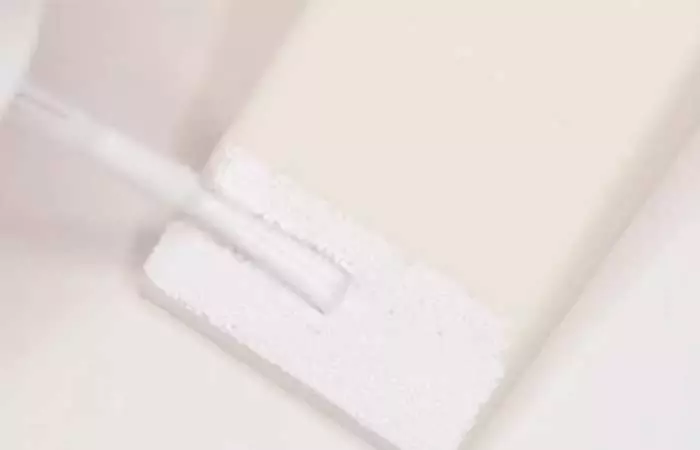
Image: YouTube@yanairbe
Layer a generous amount of white nail polish on the tip of the disposable sponge.
Step 5: Apply The Nude Or Flesh-Toned Nail Polish To The Sponge
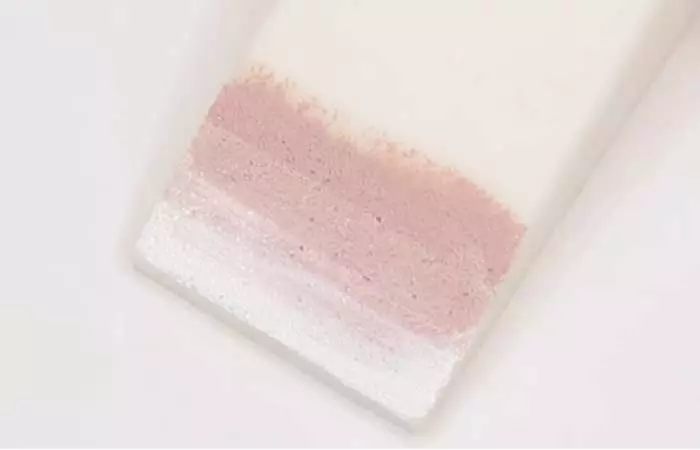
Image: YouTube@yanairbe
Layer a generous amount of nude or flesh-toned nail polish below the sponge tip to create a gradient effect.
Step 6: Dab The Sponge Onto The Nail
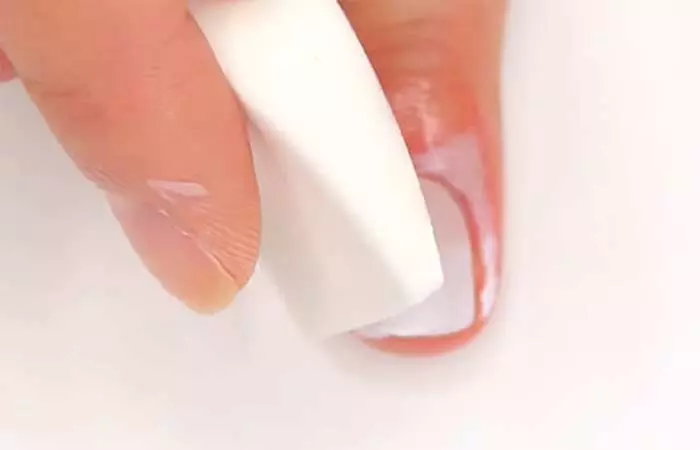
Image: YouTube@yanairbe
Hold the sponge so that the white nail polish is at the nail tip and dab it onto your nails.
Step 7: Repeat Steps 5 And 6
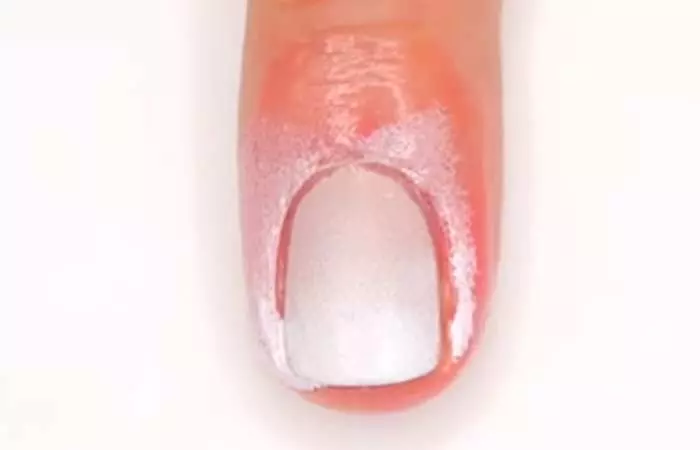
Image: YouTube@yanairbe
Layer some more nail polish on the sponge and stamp it over your nails to get the desired color intensity. Let it dry before moving on to the next step.
Step 8: Remove The Liquid Latex Tape
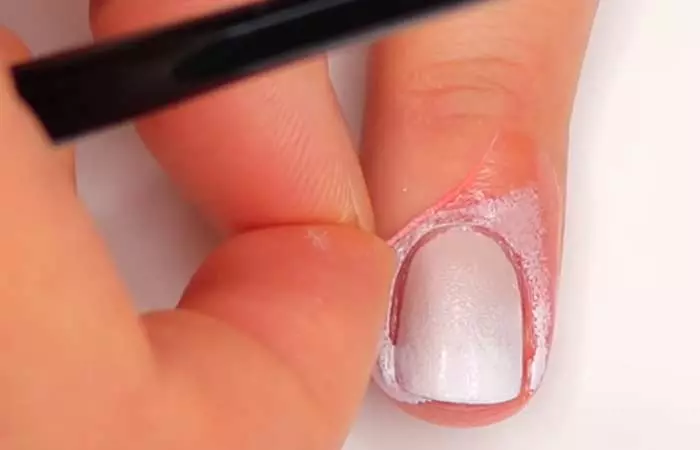
Image: YouTube@yanairbe
Peel off the liquid latex tape using a brush or your fingers.
Step 9: Apply The Top Coat
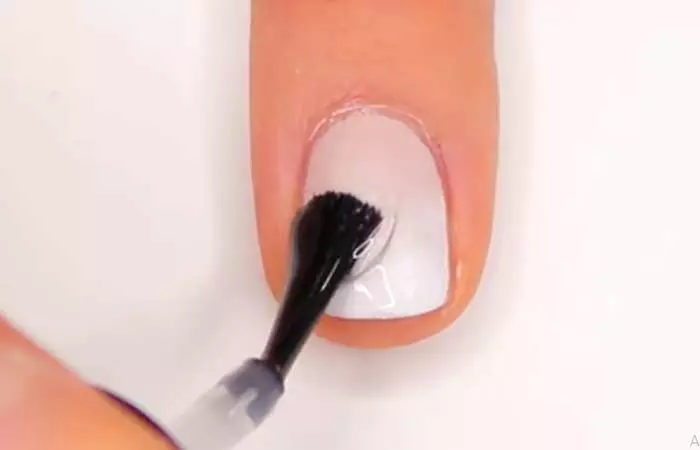
Image: YouTube@yanairbe
Apply the top coat for a smooth and shiny finish. If you have created any gradient effect on your nails, seal the manicure with a gradient top coat for added protection and luminous shine.
Final Result
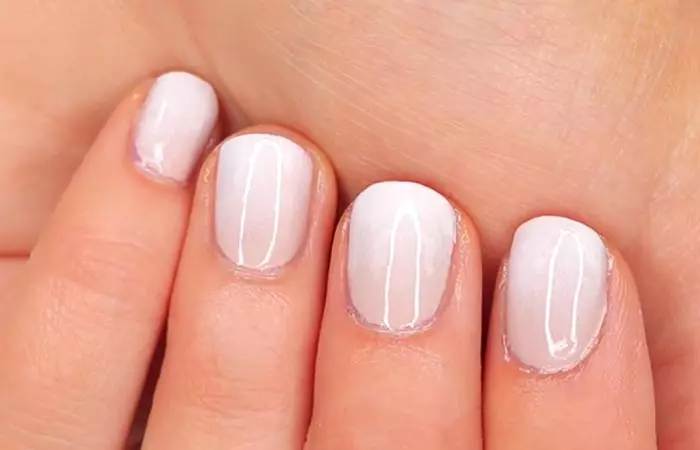
Image: YouTube@yanairbe
There you have it, your transition to beautiful French ombre nails. You can use multiple colors to create an ombre effect or glamorous glitter ombre nails. Read on for some pro tips to make your ombre nails stand out!
Additional Tips
- Try using a sheer polish over the ombre. A sheer or shimmer top coat can help blend colors even more and add an elegant, glossy finish.
- Use a high-quality top coat to smooth out the design and make your manicure last longer.
- Blend colors with a small brush and acetone. If the gradient looks harsh, lightly dab a small brush with acetone to soften the transition. Use a light touch to avoid removing too much polish.
- Work in thin layers for better control. Applying multiple thin layers instead of one thick coat helps build a more natural fade and reduces the chances of smudging or streaking.
The following videos will help you understand how to create colorful ombre nails and glitter ombre. Scroll down to check them out.
Key Takeaways
- The effect in which two or more colors seamlessly blend into one another is called ombre.
- In French ombre, the white nail tips gradually diffuse into a nude base.
- You can create an ombre effect with different colors, metallic shades, and glitter as well.
- You can also do ombre nails with or without a sponge.
How To Do Colorful Ombre Nails At Home (Video)
French ombre is classic. But if your heart reaches out for other colors and not just nude shades, go all-in with your color sense to create beautiful ombre nails at home. Check out the following video to get inspiration and a few tips for colorful gradient nails. Ooh! That looks super good! But, if you do not want to create a glitter ombre without a sponge, we have a tutorial. Just keep scrolling!
5 Ways To Do Ombre Nails With And Without A Sponge (Video)
Using a sponge is a popular way to create ombre nails. But you can also use the polish brush tip to create ombre nails with regular nail polishes or glitter nail polishes. Check the following video out to get a 360 of all the options you have to create ombre nails at home.
Learn how to create a beautiful ombre nail look in minutes! Follow this video for an easy tutorial and you’ll be rocking this trendy style in no time.
Scroll down to explore a few ombre nail design ideas and how to do them easily at home.
5 Best Ombre Nail Design Ideas
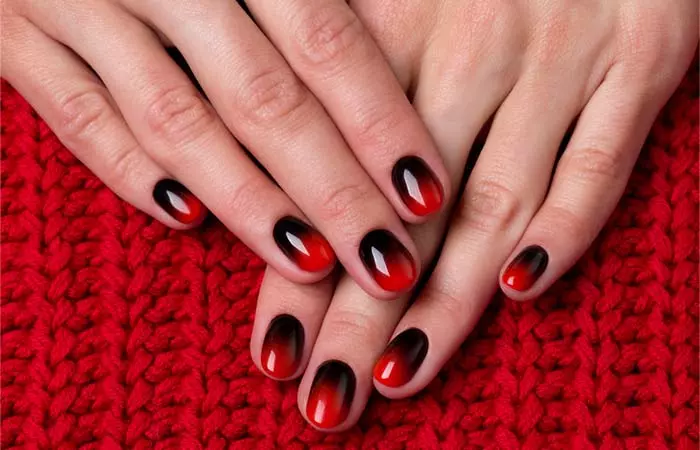
1. Deep Red And Black Ombre Nails
Shutterstock
Red and black ombre nails make for the perfect Halloween manicure. If you are not fond of this color combo, you can combine white and red for a more Valentine’s Day feel. The deep red looks extremely stylish and feminine. Here’s how you can recreate this design.
DIY Step-By-Step Process
Step 1: Apply a layer of base coat and allow it to dry.
Step 2: For your base color, apply deep red nail polish.
Step 3: Apply the same red and black nail polish on a sponge. Dab it onto your nails to create an ombre effect.
Step 4: Clean up around the nails.
Step 5: Apply a gel or a matte top coat.
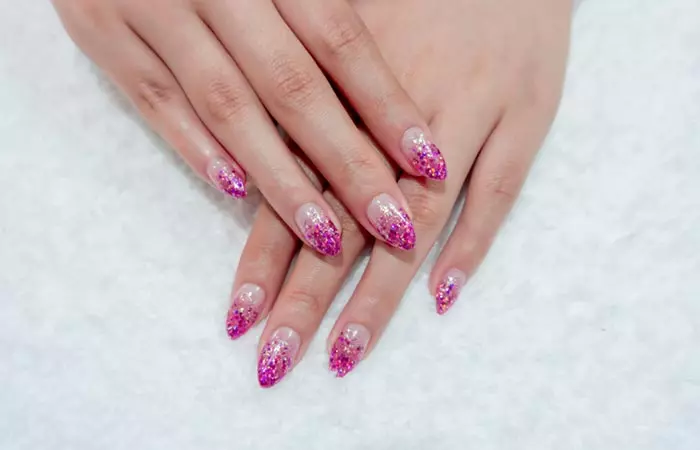
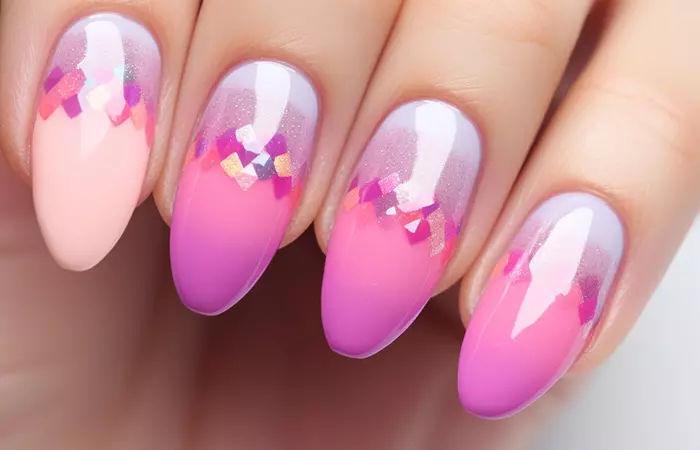
2. Silver And Pink Glitter Ombre Nails
Shutterstock
This is one of the cutest ombre nail designs. Want to style your ombre nails with a glitter accent? This design does that perfectly with a subtle silver glitter nail polish on the accent fingernail. A pink ombre nail look like this is a breeze to recreate and we will show you how.
DIY Step-By-Step Process
Step 1: Apply the white nail polish as the base coat.
Step 2: Apply the pastel pink and white nail paints on the sponge and dab it onto your nail.
Step 3: Repeat the step to intensify the ombre effect.
Step 4: Apply the silver glitter nail polish to your accent nail.
Step 5: Secure your manicure with a gel finish top coat.
3.Metallic Ombre Nail Design
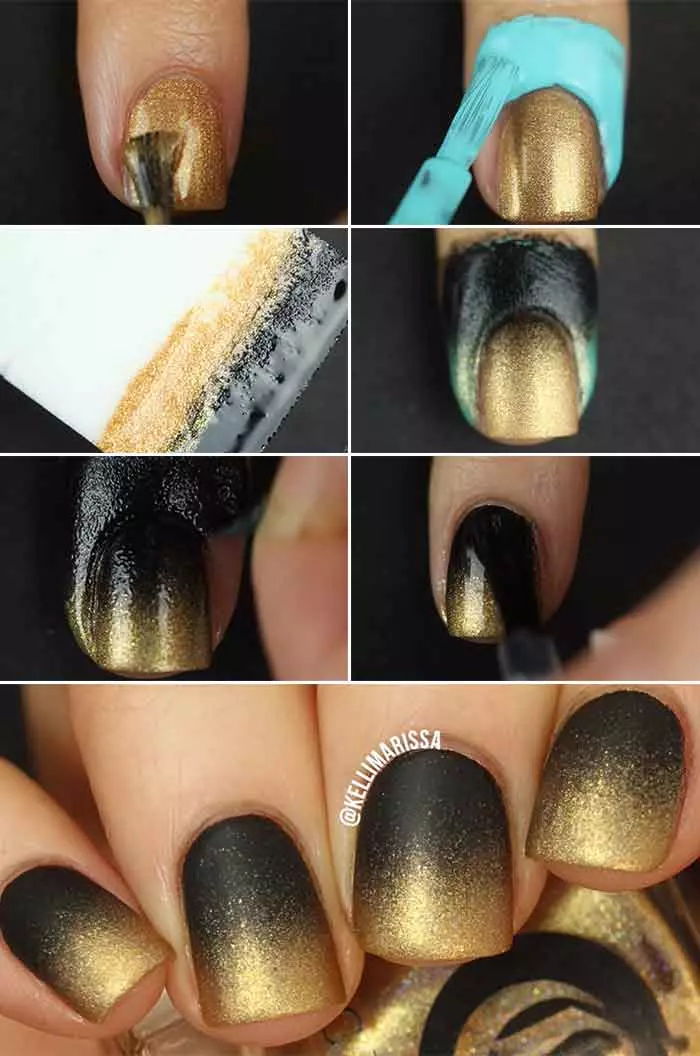
Image: YouTube@KelliMarissa
Want to glam up your outfit? This metallic ombre nail design will do the trick. It is not over-the-top but just the right amount of classy! Give this a shot if you have something special coming up.
DIY Step-By-Step Process
Step 1: Paint your nails with champagne or gold glitter nail polish and let them dry.
Step 2: Apply liquid latex around the nails.
Step 3: Apply some black and gold polish to your wedge sponge and gently dab it onto the nail edges.
Step 4: Once you are satisfied with the ombre effect, apply a layer of top coat to secure the manicure.
Step 5: Clean up the sides of your nails with a thin brush and some acetone.
4.Ombre Sunshine Nail Design
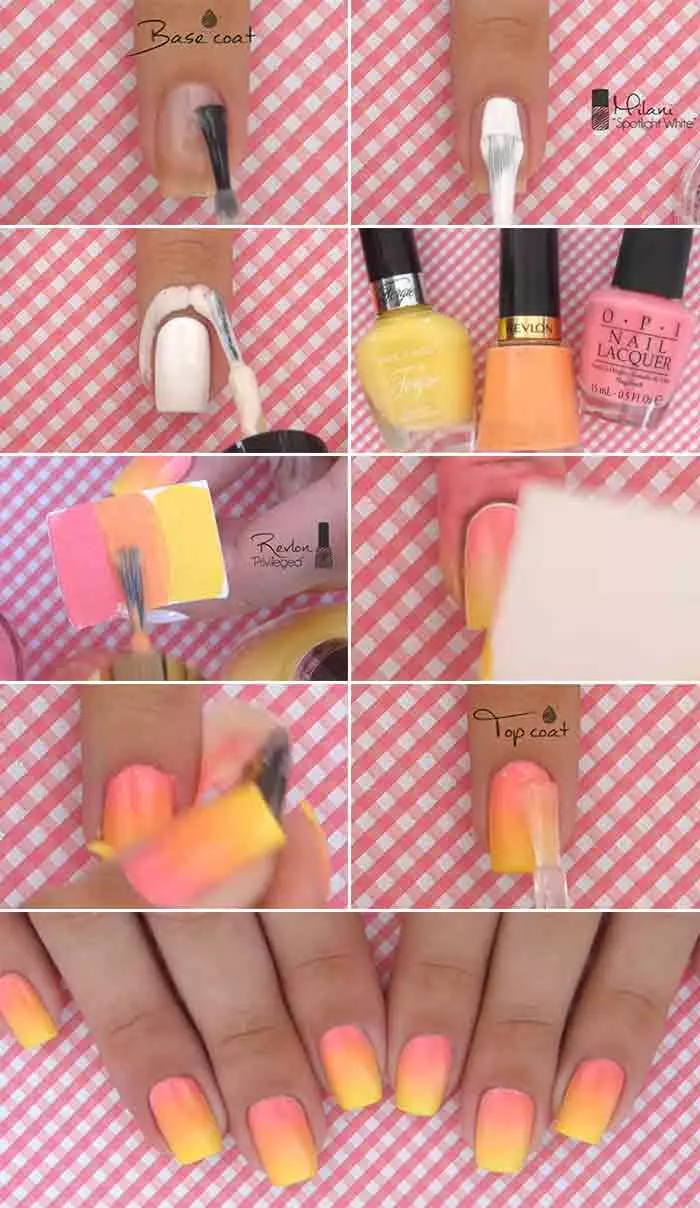
Image: YouTube@cutepolish
This ombre nail design is a must-try for your next beach holiday. The yellow, orange, and pink blend beautifully to give you this summer sunshine look.
DIY Step-By-Step Process
Step 1: Apply a base coat to protect your nails.
Step 2: Apply a white base color for the best gradient opacity and allow it to dry.
Step 3: Apply liquid latex around the nails.
Step 4: Apply three stripes of color to your makeup sponge, allowing the colors to overlap slightly.
Step 5: Dab it onto your nail and let the first layer dry. Reapply the colors onto the sponge and repeat the step.
Step 6: Finish off with a top coat to blend the gradient.
Step 7: Peel off the latex. Clear the edges around the cuticles with a brush and acetone.
5. Watercolor Ombre Nails
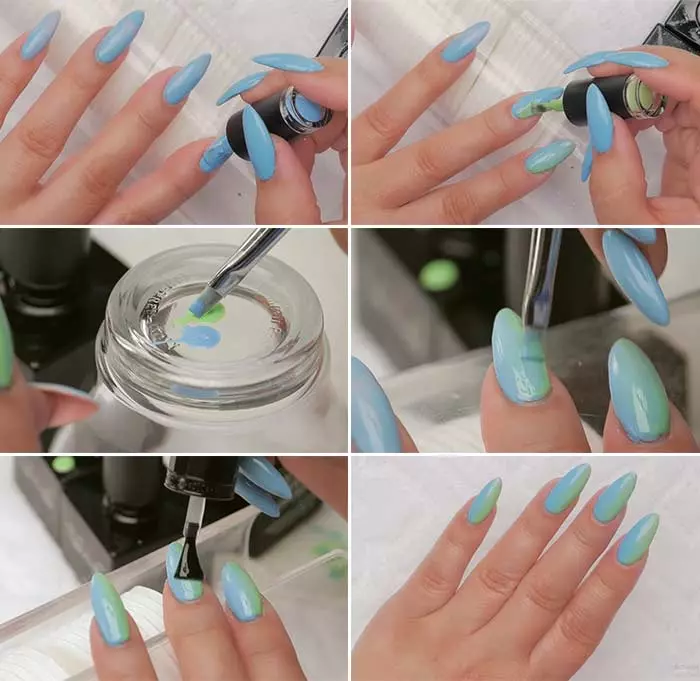
Image: YouTube@NailCareerEducation
If you do not have a sponge or any other tools for your DIY nail art project, you can still do something very cool! These gorgeous watercolor ombre nails do not require any tools.
DIY Step-By-Step Process
Step 1: Apply a layer of base coat.
Step 2: Apply the first color to one half of your nail.
Step 3: Before the first color dries, apply the second color to the other half of your nail.
Step 4: Take the same two colors with a brush and blend them on a glass base.
Step 5: Apply the blended colors to your nails for a watercolor effect.
Step 6: Finish with a topcoat.
Beautiful ombre nails can elevate your outfit instantly. However, if not done properly, your nails can end up looking messy. There are some common mistakes you must consciously avoid to achieve the desired ombre effect on your nails. Check out the next section to know more!
Common Mistakes To Avoid When Doing Ombre Nails
You should steer clear of a few faux pas to achieve a flawless ombre nail look. Here are some pitfalls to look out for:
- Neglecting The Base Coat: Skipping the base coat can cause the polish to stain the nails permanently. It may also mess up the ombre effect. Start by applying a base coat to protect your nails and allow smooth application of the polish. If your nails have any ridges or are rough, a base coat acts as a smooth first layer to apply the main polish color on.
- Mixing Incompatible Colors: Using colors that do not complement each other at all, can create an unflattering look. This lackluster blend will ruin your nail look entirely. Select shades from the same color family to achieve a smooth transition.
- Using Too Much Polish On The Sponge: Excessive polish can cause a blotchy and unflattering ombre effect. Start with a small amount and build up gradually to achieve a seamless finish.
- Not Allowing Enough Drying Time: Rushing in between the steps can either cause the polishes to blend too much or get smudged entirely. So, give the manicure enough time to dry before proceeding with the next step.
- Skipping The Top Coat: Forgetting to apply a top coat can expose the manicure to pollutants. The polish can also chip or peel off easily. Thus, seal the manicure with a high-quality top coat. The top coat also gives your nails a glossy and smooth finish.
While single-color painted nails have their own charm, an ombre effect adds more pizzazz. You can dial up the effect or tone it down using muted or vibrant shades to reflect your current mood. Think of your nails as your canvas and let your creativity take over. Get your polishes out and create nail art that fades to nothing short of a masterpiece.
Infographic: How To Do Ombre Nails Using Dip Powder
Ombre nails start light-hued at the top and bleed into a darker color at the bottom. However, you can also play around with vertical and diagonal ombre nail art. Experiment with color combinations and nail art accessories like glitter, rhinestones, stickers, etc. Don’t be shy to try out faux nails, especially if you have small or brittle nails. Faux nails allow you to experiment thoroughly without worrying about damaging your real nails. As you read up and practice how to do ombre nails, you will become a pro at acing this nail art trend. Then you can get more creative and design your unique nail art. So, get to painting your nails into masterpieces!
How long do ombre nails typically last?
Ombre nails can typically last two to four weeks depending on factors such as nail care and the quality of the polish used. For instance, gel polish lasts longer than regular polish. Additionally, if you moisturize your cuticles daily, the polish will not chip easily and the manicure will last longer.
Can you do ombre on real nails?
Yes, you can do ombre on your real nails easily.
Can you do ombre with gel polish?
Yes, you can ombre with gel polish and a makeup sponge but it may take more time and requires practice.
Is ombre gel or acrylic?
While ombre nails are traditionally done using acrylic, ombre is also available in gel or dip powder. You can choose as per your preference.


Community Experiences
Join the conversation and become a part of our empowering community! Share your stories, experiences, and insights to connect with other beauty, lifestyle, and health enthusiasts.


Pink ombré nails have taken the beauty scene by storm, emerging as the latest nail trend that seamlessly blends sophistication with a touch of playfulness. This captivating style is an echo of the timeless French manicure. It involves a gradient of pink hues, transitioning from a lighter shade to a bolder tone and vice versa. The gradient effect adds dimension to the nails and allows for creative expression through shades of pink. This style exudes versatility and is suitable for both casual and formal occasions. Pink ombré nails have become a choice for those seeking a chic nail art option, combining classic elegance with a contemporary flair. If you need inspiration for your next manicure, you should check out these 35 pink ombré nail ideas!
- Time: Dedicate sufficient time while getting a pink ombré. Allow the layers to dry properly for the colors to transition smoothly.
- Maintenance: Follow a nail care routine which includes touch-ups and cuticle care to maintain the vibrancy.
- Quality: Invest in high-quality nail polish or dip powder for a smoother application and longer-lasting results.
- Compatibility: Ensure that the chosen pink shades complement each other well in the ombré transition.
In This Article
What Are Pink Ombré Nails?
The switch from solid colors to a gradient of different shades is not limited to hair and makeup. After ombré lips , hair color, and eye makeup, ombré nails, especially pink ombre nails, are the latest trend.
Pink ombré nails refer to a trendy nail design where shades of pink blend seamlessly from light to dark, creating a gradient effect. The term “ombré” originates from the French word meaning “shaded” or “shading.” It represents a gradual transition of colors, typically from a lighter hue at the base to a deeper or darker shade towards the tips.
Ombré nails involve skillful application techniques such as sponge blending or brush strokes to achieve a smooth transition. The best thing about playing with different shades of pink is that you can opt for a sophisticated look or go all out with glittery pink ombré nails.
Pink ombré nails are in style and here to stay, so why not get one for yourself and see which design suits you the best? If you do not like one, you can go for another, but the one thing that can affect the overall look of your nails is the nail shape. Find out more in the section below.
Key Takeaways
- Pink ombré nails offer a versatile range, suitable for various occasions and personal styles.
- Nail shapes like coffin, stiletto, round, almond, and square are the best for this ombré effect.
- Adjust the intensity of pink shades based on the seasons, choosing lighter tones for spring and vibrant hues for summer.
- Experiment with pink shades, considering skin tone and occasion to nail your look and style.
What Nail Shapes Work Best For Ombré Nails?
If you want your pink ombré nails to stand out, you must be familiar with the nail shapes that work the best for this particular manicure. Although it depends on your personal preferences, the following nail shapes are the best for this nail art style:
- Almond Shape: Almond-shaped nails complement ombré designs by providing a sleek canvas for a seamless color transition.
- Coffin Shape: This edgy shape offers a dramatic and stylish look with a squared-off tip that showcases the gradient beautifully.
- Square Shape: Square nails provide a classic and versatile option for ombré designs. The straight-across tip allows for a clean and distinct color shift.
- Stiletto Shape: Stiletto nails, with their pointed tips, add a touch of drama to ombré styles. The shape accentuates the gradient, creating a bold and striking appearance.
- Round Shape: Round nails offer a softer, more natural look for ombré designs. The curved tips provide a gentle transition between colors, ideal for a subtle gradient effect.
These nail shapes will make your pink ombré nails stand out to make a statement, but what shade of pink works best for this style of nails? Check it out in the section below.
What Shades Of Pink Work Well For Ombré Nails?
All shades of pink are pretty, but only select ones work well for an ombré look. While selecting those designs, it is also a good idea to know what other color pairs well with a particular pink shade.
- Baby Pink: Soft and subtle, baby pink adds a sweet touch to the gradient when paired with white, rose gold, or nude colors.
- Peach: A warm and muted pink that complements other shades like magenta, purple, and hot pink seamlessly.
- Rose Gold: A medium pink with a hint of red, adding depth to the ombré transition. It pairs well with black, white, and gold.
- Coral: A vibrant and lively pink-orange shade for a pop of color in the middle gradient and pairs well with purple, white, and black.
- Magenta: A bold and intense pink that works well as a transition toward the tips with colors like purple, lavender, and coral.
- Hot Pink: A bright and vivid pink that adds drama to the ombré effect and adds more effect when paired with teal, black, or pale pink.
- Dusty Rose: A muted, dusty pink, when paired with gold, white, or pale pink, imparts a vintage and sophisticated vibe.
- Metallic Pink: Shimmery and reflective, metallic pink can be used as an accent or at the tips for a glamorous touch and stands out with solid colors like navy blue, taupe, lavender, and mint green.
If you pair the shades of pink above with the right colors, the resulting gradient effect can be worn for different occasions ranging from professional to festive events. If you know the shade of pink you want, it is time to explore some pink ombré nail styles! Scroll down to the next section!
35 Best Pink Ombré Nail Ideas
Elevate your style with an array of mesmerizing pink ombré nail designs, ranging from delicate pastel hues to vivid, bold shades. The nail ideas below offer the perfect inspiration for your next manicure.
1. Yellow And Pink Ombré Nails
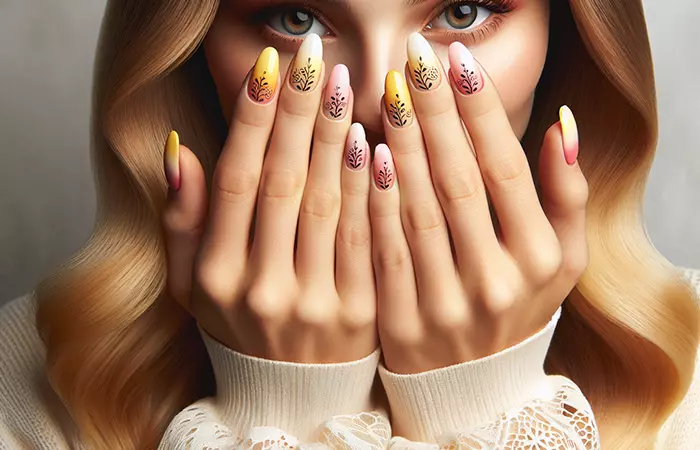
Created with Dall·E
A perfect ombré style to make your spring more dazzling! The combination of yellow and pink makes your nails appear brighter and the added floral design in black captures the essence of a blooming garden. Embrace the burst of colors and nature’s beauty at your fingertips!
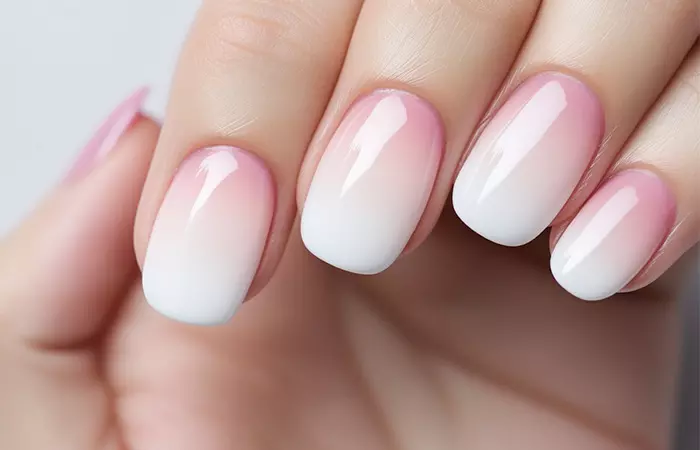
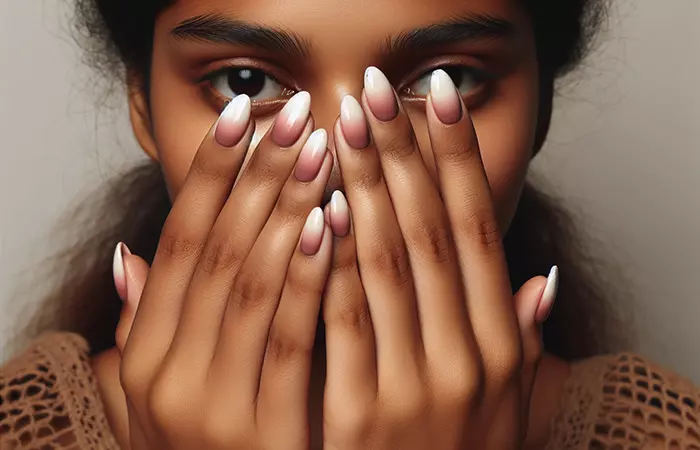
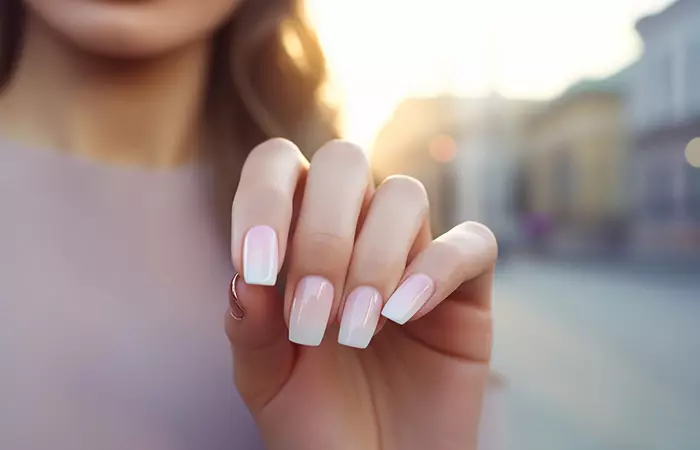
2. White And Pink Ombré Nails
Created with Dall·E
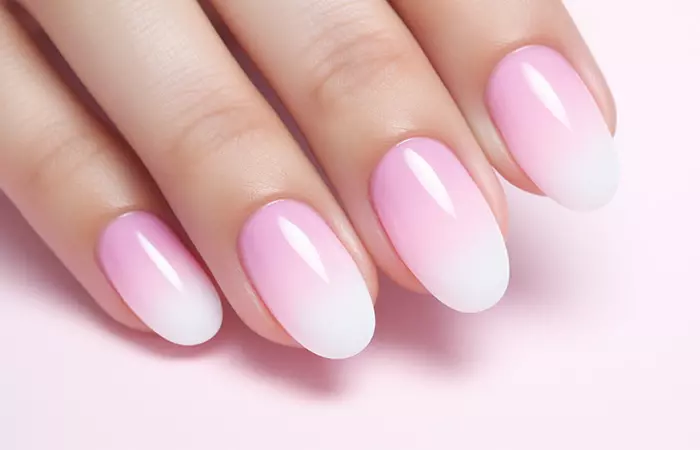
Transform your nails into a serene canvas with white and pale pink ombré magic. Envision a gradient of tranquility, where the soft transition from delicate pale pink to pristine white mirrors the dreamy glow of the setting sun. Achieve timeless elegance with this subtle blend, ensuring your nails radiate a sophisticated charm that is also effortlessly chic.
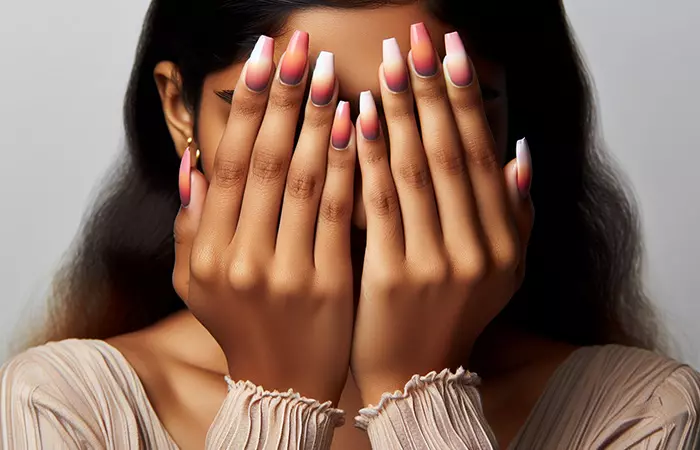
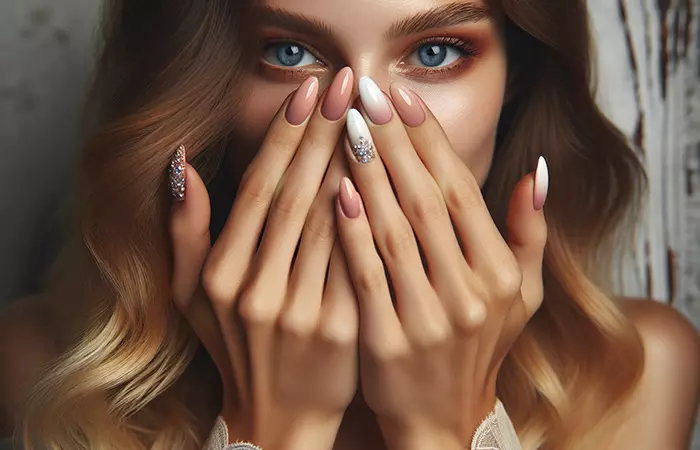
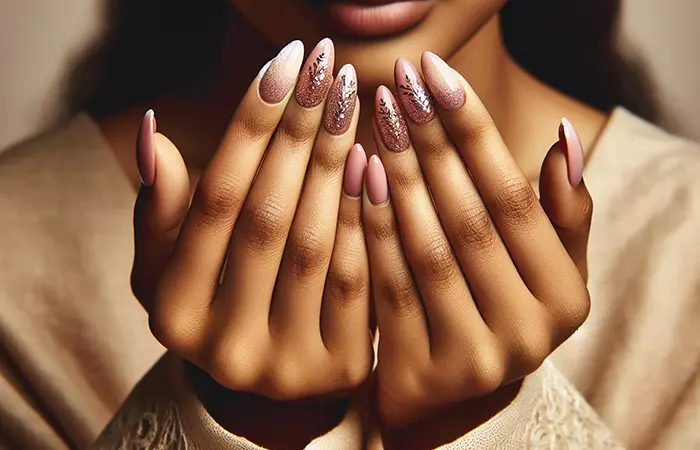
3. Almond Pink Ombré Nails

Created with Dall·E
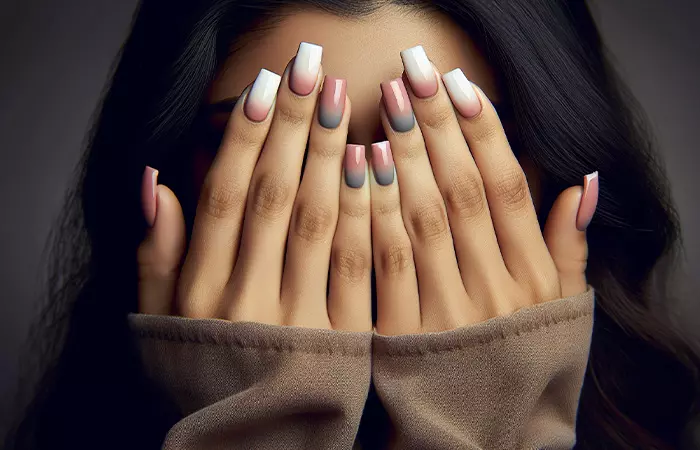
Elevate your nail game with almond-pink ombré nails. Flaunt a graceful blend of rosy and woody hues, seamlessly transitioning from a subtle blush to white and from rosy pink to a darker almond pink hue with tones of brown. This modern design may seem harder to achieve but is oh-so satisfying when it catches the eye.
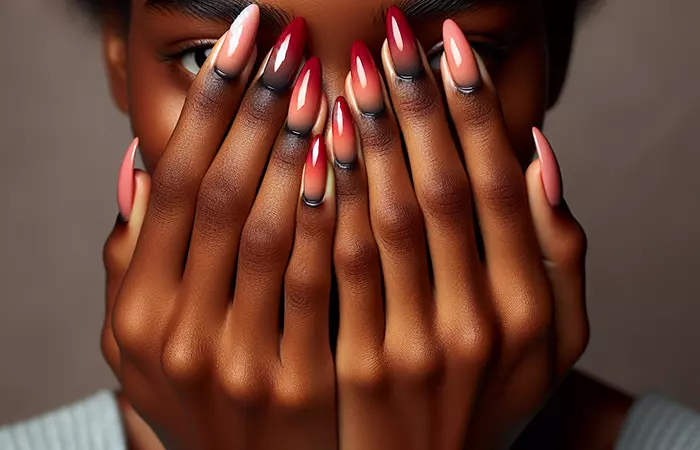
4. Red Pink Ombré Nails
Created with Dall·E
Ignite the passion with stunning red and pink ombré nails. Picture the seamless fusion of a soft pink gracefully transforming into a bold red, creating a fiery and dynamic gradient. The addition of black at the cuticles only adds to the drama. These nails strike an expression of confidence where each shade embodies the intensity of your personality.
5. Coral Red And Pink Ombré Nails
Created with Dall·E
If you are looking for an ombré style that reflects a tropical theme, then this is the one for you! Picture the vivacious blend of coral’s warmth meeting the soft allure of pink in a seamless transition. Envision your nails as a vibrant sunset captured at your fingertips, radiating charm and playfulness.
6. Pink Sunset Ombré Nails
Created with Dall·E
This captivating ombré nail design will reflect the mesmerizing hues of a pink sunset. Picture the seamless blend of soft pink, white, and mauve transitioning gracefully using the delicate tones of dusk and the warmth of twilight. Let your nails tell a story of serene beauty, capturing the essence of a romantic evening sky at your fingertips.
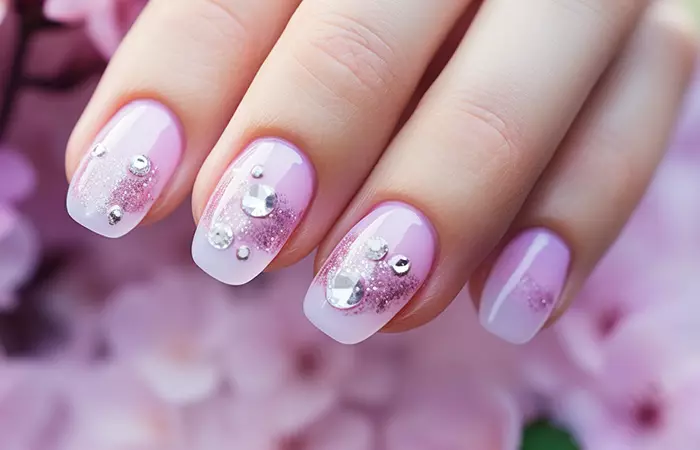
7. Pink Ombré Nails With Crystal Embellishments
Created with Dall·E
Elevate the look of your nude pink ombré nails by adding some crystal embellishment! Picture a seamless gradient of delicate nude pink and white, accentuated by sparkling crystals that catch the light. Imagine your nails as a dazzling masterpiece, combining modern chic with a touch of glamour.
8. Pink Ombré Square Nails
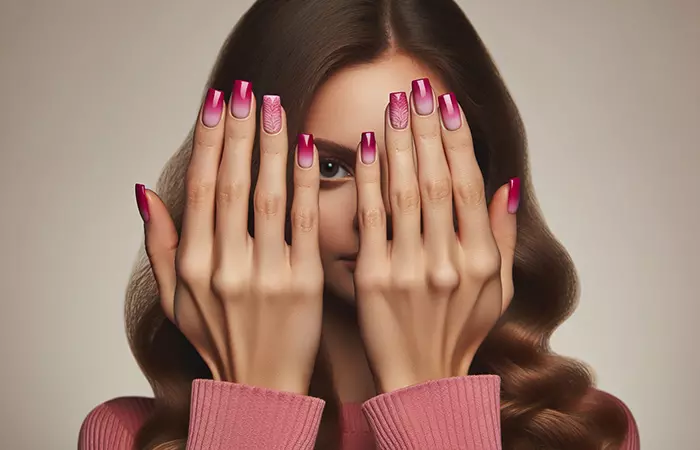
Created with Dall·E
Square nails are perfect for all occasions, add some pink and you are ready to take on the world! The clean lines of square tips are adorned in a seamless gradient of enchanting pink and red. Elevate your style game with this trendy and crisp ombré design.
9. Pink Ombré Nails With Diamonds
Created with Dall·E
Diamonds are your best friend in any season! Envision a flawless gradient of brown and nude pinks, accentuated by the brilliance of carefully placed diamonds on one nail. Your nails, a radiant masterpiece, embody grace with a bling.
10. Pink Ombré Coffin Nails
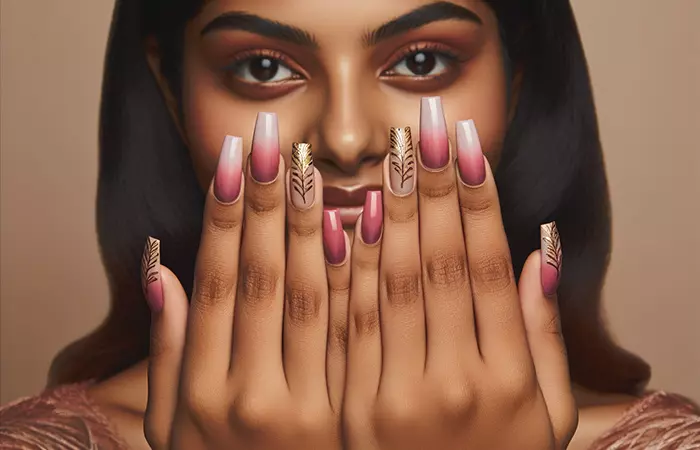
Created with Dall·E
The bold allure of pink ombré coffin nails is irresistible! The nails feature a dark maroonish shade, a lighter pink shade, and white for an effective gradient look. The gold leaf art on some fingers adds a bit more complexity to the gradient. It is an edgy yet classic coffin nail style that screams confidence.
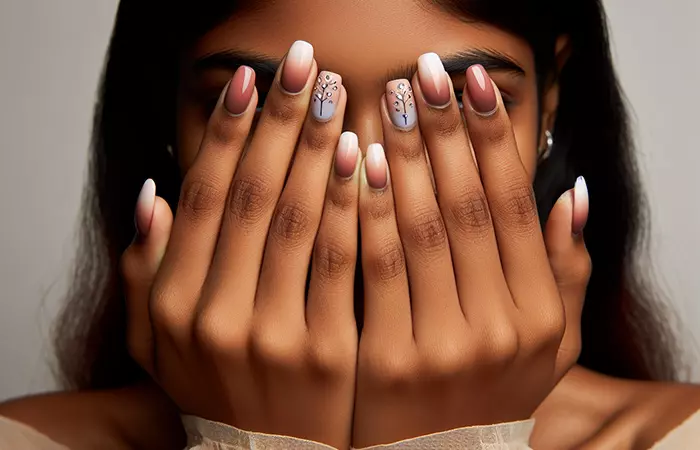
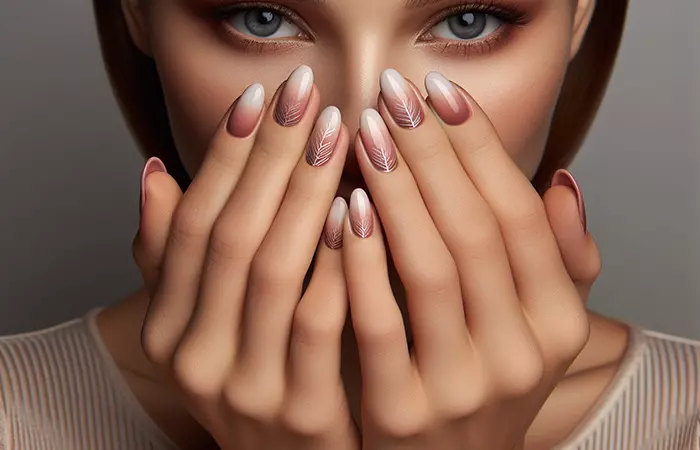
11. Nude Pink Ombré Nails
Created with Dall·E
A great winter-style nail idea to add some warm tones to your life! If you do not want to go for the same old winter colors and patterns, then give this one a try! The nude pink ombré with the warm tones of brown matches well with white, and the added white leaf nail art makes it appear artistic.
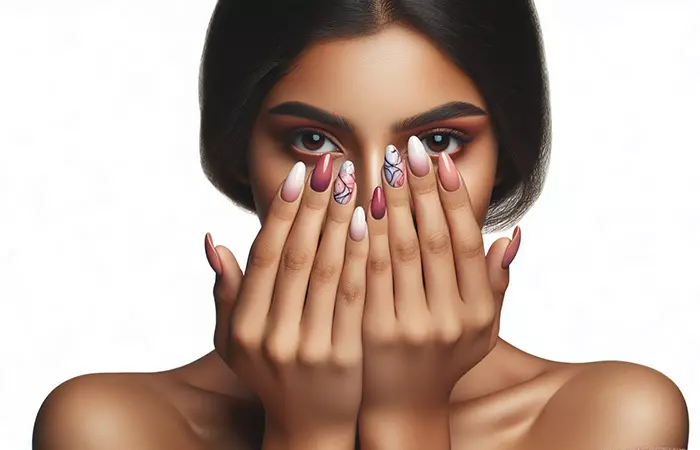
12. Pink Marble Ombré Nails
Created with Dall·E
Paint your nails with different shades of pink and red and pair it with white for a gradient effect on your nails. If that feels too simple for you, you can play around with the marble design by using white as the base and pairing the same shades of pink and red with some blue to add more flare to your nails.
13. Purple And Pink Ombré Nails
Created with Dall·E
Want a pink ombré design with some more color and patterns? See if you can pull this one off. Making use of multiple shades like baby pink, shimmery pale pink, purple, cream, and light blue. This purple and pink ombré nail design will give you a modern Barbie feel!
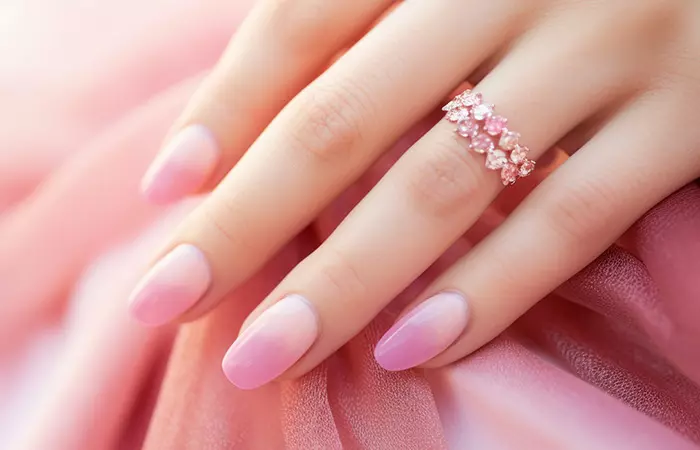
14. Pale Pink Ombré Nails
Created with Dall·E
Revv up the elegance with your set of pale pink ombré nails delicately blended with nude tones. The transition begins at the cuticles with a dark nude pink shade to pale pink, then white, creating a beautiful gradient effect. This subtle nail ombré style speaks of your confident style choices.
15. Orange And Pink Ombré Nails
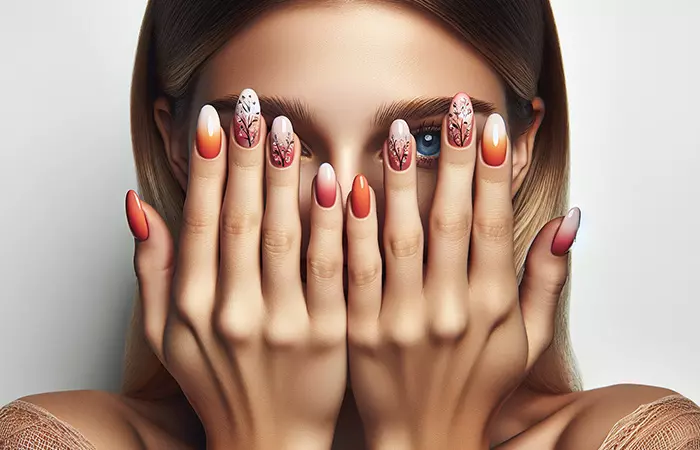
Created with Dall·E
Adorn your nails with a vibrant orange and pink ombré, reminiscent of a breathtaking forest lit by the setting sun. Embrace nature’s beauty as delicate leaves and blossoms gracefully dance across your nails, bringing a touch of the outdoors to your fingertips. Let the harmonious blend of colors and organic patterns inspire tranquility.
16. Soft Pink Ombré Nails

Created with Dall·E
The delicate shades of pink, peach, and brown seamlessly transition, creating a chic and beautiful gradient. This timeless design effortlessly complements any style, adding a touch of elegance to your fingertips. Embrace the beauty of simplicity with this feminine and refined nail aesthetic.
17. Hot Pink Ombré Nails
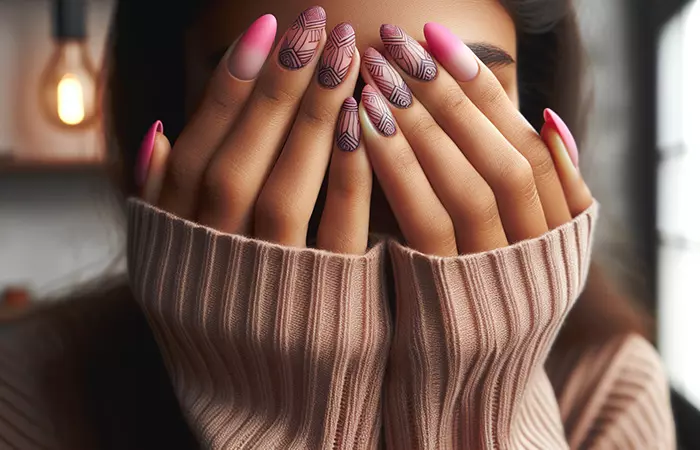
Created with Dall·E
Ignite your style with hot pink ombré nails that radiate energy. The vibrant gradient commands attention, while intricate and sleek line art adds a bold, modern twist. Geometric patterns or minimalist accents in black create a dynamic visual impact. Elevate your look with this electrifying combination, embodying confidence and individuality in every stroke.
18. Glitter Pink Ombré Nails
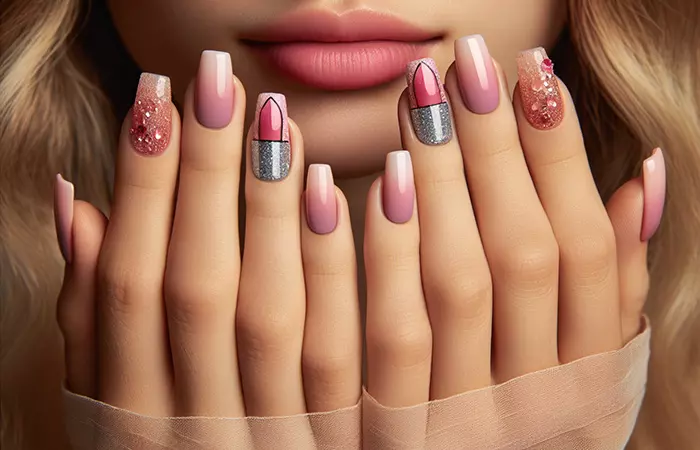
Created with Dall·E
Dazzle with glamour in glitter pink ombré nails featuring silver glitter nail paint. Unleash creativity with intricate designs that playfully dance across your nails. Elevate its look with strategically placed pink rhinestones, adding a touch of luxury. Let your fingertips become a canvas of sophistication, sparkling with a harmonious blend of glitter, design, and dazzling details that captivate and celebrate your unique style.
19. Light Pink Ombré Nails
Created with Dall·E
Elevate your elegance with light pink ombré nails. The gentle transition from soft pink hues to white creates a subtle and chic gradient. This versatile style effortlessly enhances your femininity, providing a delicate touch to your overall look. Embrace the simplicity and sophistication of light pink ombré nails for a refined aesthetic that complements your go-getter attitude.
20. Baby Pink Ombré Nails
Created with Dall·E
Adorn your nails with the sweet charm of baby pink ombré, some transitioning into white while others transitioning from grey to pink The gentle gradient evokes a sense of tranquility and sophistication. Subtle yet chic, this design captures the essence of understated beauty. Let your fingertips radiate a delicate elegance, harmonizing the innocence of baby pink with the crispness of white and the muted allure of grey.
21. Pink To White Ombré Nails
Created with Dall·E
Grace your nails with the enchanting simplicity of pink-to-white ombré. The seamless transition from a soft pink to pristine white creates a timeless and clean aesthetic. This gradient exudes a soft and sophisticated charm with its classic yet contemporary design.
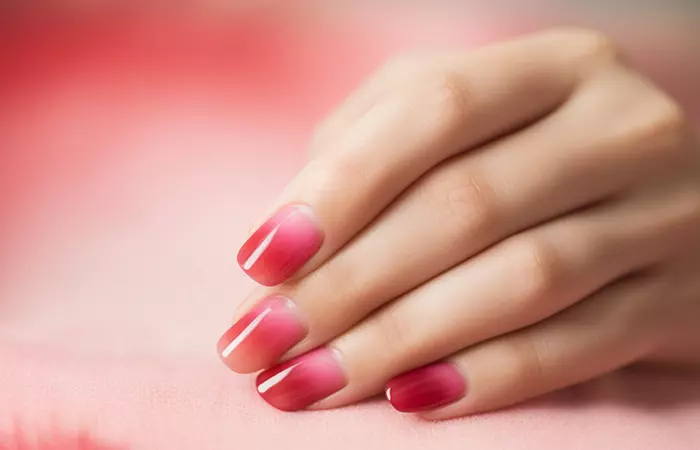
22. White To Pink Ombré Nails
Created with Dall·E
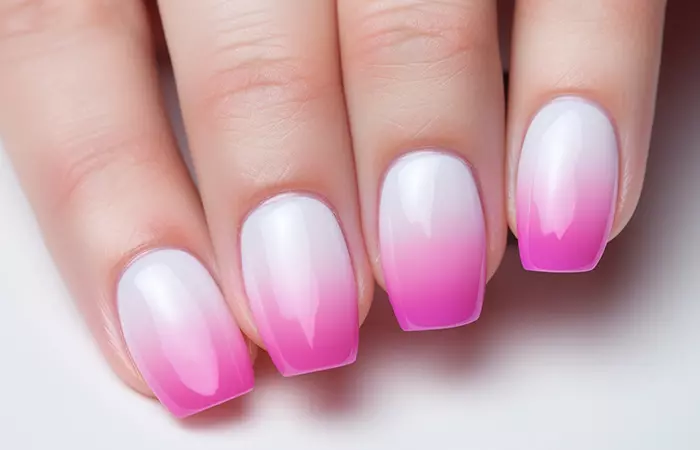
Want a bright pink color on your tips but you do not want to go overboard with the design? Then this is the one you should try! The white transitions into a bright yet soft pink shade that gives your nails the perfect oomph. It is a perfect nail design for a meeting or a night out.
23. Light Pink Ombré Nails With Glitter
Created with Dall·E
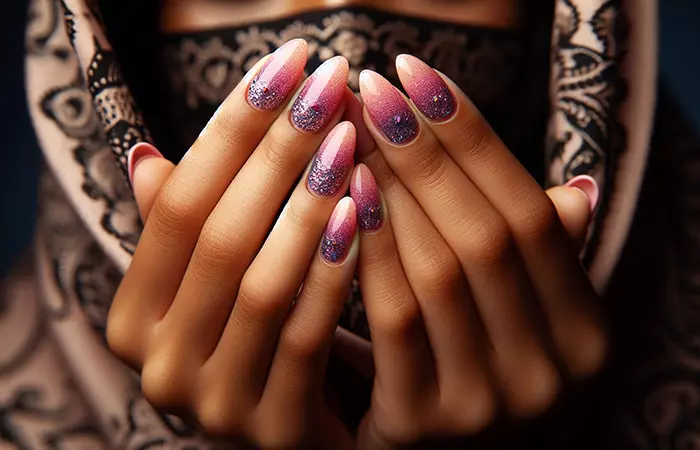
Illuminate your nails with a radiant touch! Indulge in the ethereal beauty of light pink ombré, adorned with a sprinkle of glitter at the cuticles. The bluish-purple hint of the glitter adds more vibrancy to the pink shades. This sparkling manicure is chic, stylish, and festive at the same time.
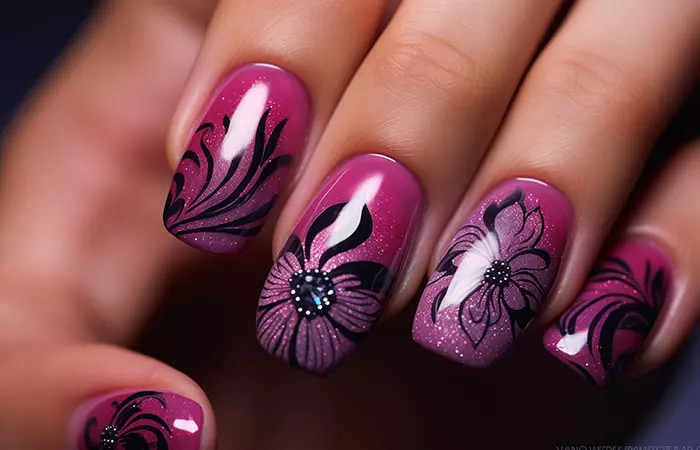
24. Dark Pink Ombré Nails
Created with Dall·E
Adorn your nails with sultry dark pink ombré with some glitter and a bold black floral design. Elevate the allure with strategically placed rhinestones, adding a touch of glamour to your fingertips. The deep color matches well with the black design, giving it a mysterious flair that makes heads turn.
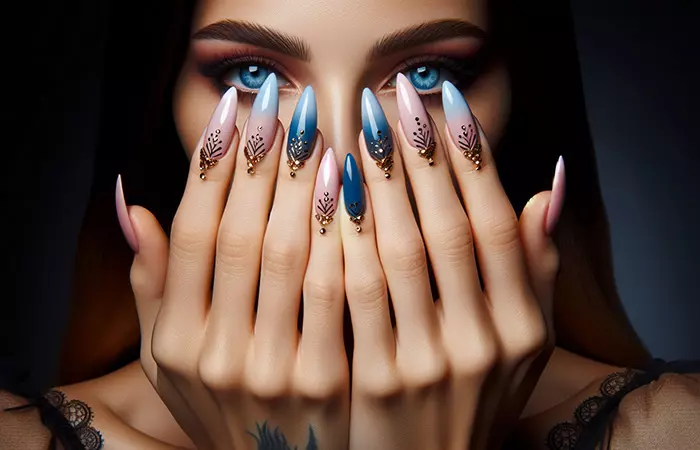
25. Blue And Pink Ombré Nails With Embellishments
Created with Dall·E
Create a mesmerizing look with blue and pink ombré nails. The style features a soft pink seamlessly blending into a soothing light blue on some fingers, while a deep blue gracefully fades into the same tranquil hue on others. This harmonious blend of colors on your nails is a subtle yet striking expression of elegance and style. Add some embellishments and you are ready to rock!
26. Simple Blue And Pink Ombré Nails

Created with Dall·E
Indulge in the enchantment of blue and pink ombré nails. A gradient of soft pink and blue is painted across select fingers, along with the calming shades of blue and the delicate hues of pink on others. Enhance the style with delicate leaf nail art on some nails, adding a touch of nature to your vibrant and stylish nail art.
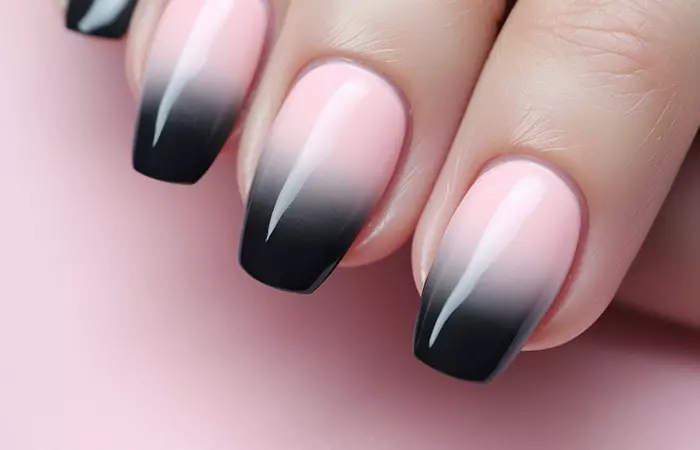
27. Black And Pink Ombré Nails
Created with Dall·E
Sport chic black and ombré nails for an edgy, sleek look. The style transitions from vibrant pink to deep black with a bold, no-nonsense gradient. Keep it effortlessly cool and modern, letting your nails make a bold statement without any embellishments.
28. Pink Ombré Glitter Nails
Created with Dall·E
Opt for almond-shaped nails featuring a sleek pink ombré glitter. The almond shape adds a touch of elegance, while the pink ombré glitter infuses a playful and eye-catching sparkle. Achieve a dazzling and trendy look with minimal effort, letting your nails radiate glamour and style.
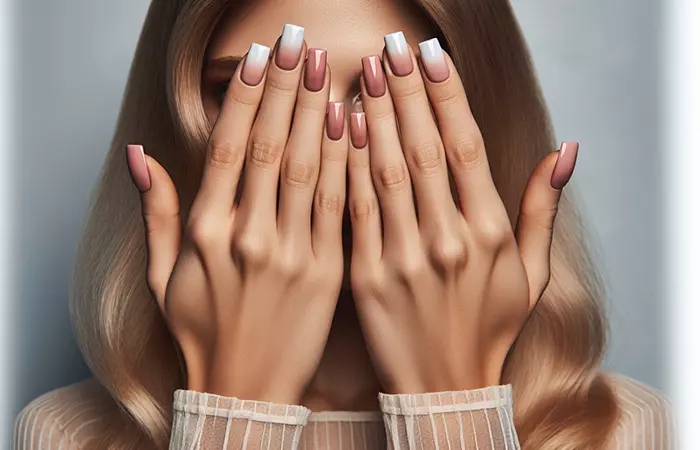
29. Pink Ombré French Tip Nails
Created with Dall·E
Elevate your classic square-shaped nails with a modern twist by getting French fade with a pink ombré effect. The subtle gradient seamlessly blends from a soft pink to a pristine white tip, adding a contemporary touch to the timeless French manicure.
30. Pink Ombré Nails With Rhinestones
Created with Dall·E
Grace your nails with a soft pink ombré effect, gently transitioning for a subtle and charming allure. Elevate the elegance with a splash of glitter, adding a touch of glamour that catches the light. Complete the look with strategically placed rhinestones, creating a delicate yet dazzling finish.
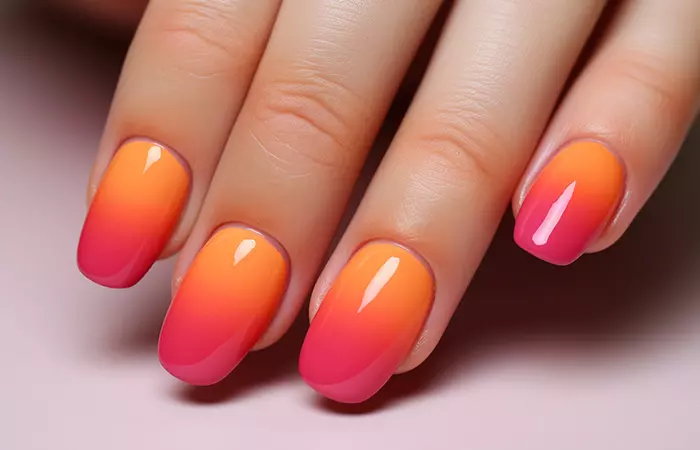
31. Orange And Pink Acrylic Ombré Nails
Created with Dall·E
Sport the trendy orange-pink acrylic ombré nails for a bold and eye-catching look. The seamless transition from energetic orange to playful pink brings warmth and a touch of fun to your nails, bringing out the playful side of your personality.
32. Pink Ombré Stiletto Nails

Created with Dall·E
Embrace a captivating ombré effect on your nails, blending bright pink, soft pink, and white seamlessly. The transition from vibrant to delicate hues creates a chic and versatile look. This elegant combination exudes a sense of playfulness, making it a perfect choice for any look.
33. Pink Ombré Dip Nails
Created with Dall·E
Give your nails a chic touch by opting for pink ombré dip nails, starting with a soft pink base. The subtle gradient transitions smoothly, adding a gentle and sophisticated charm to your manicure. This choice brings a timeless elegance to your nails, perfect for any occasion or daily glamour.
34. Pink Ombré Chrome Nails
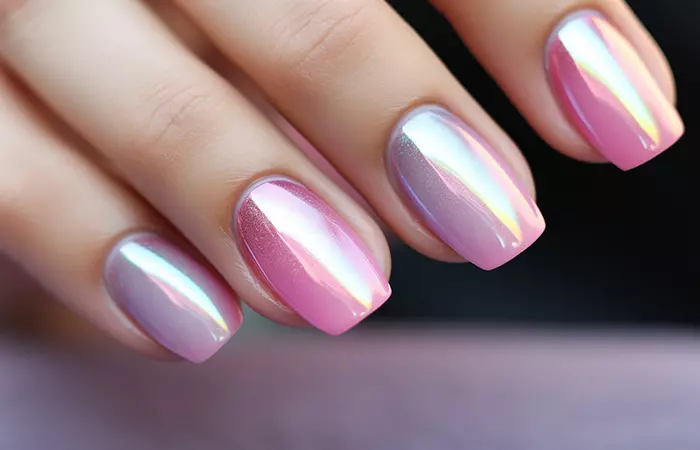
Created with Dall·E
Achieve a stunning and futuristic look with pink ombré chrome nails. The gradient effect seamlessly blends various shades of pink, creating a captivating transition. The chrome finish adds a reflective and metallic sheen, giving your nails a high-fashion statement.
35. Neon Pink Ombré Nails
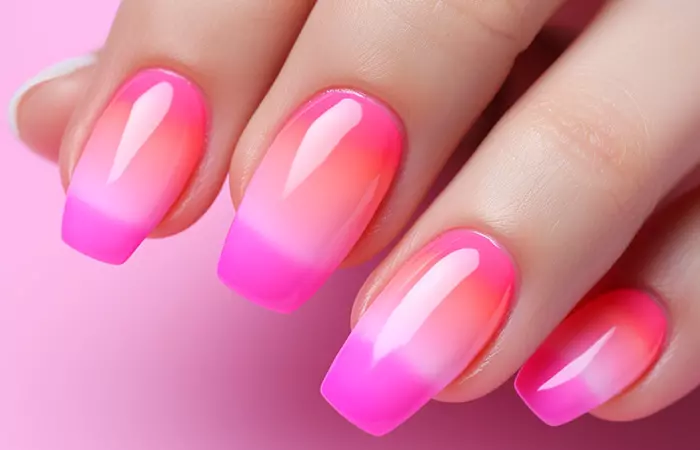
Created with Dall·E
Illuminate your nails with neon pink ombré, featuring a lively spectrum of bright pink, baby pink, and coral shades. The dynamic gradient infuses energy and vibrancy into your manicure, creating a playful and eye-catching effect. This bold combination of neon hues adds a touch of excitement to your fingertips, making a statement that’s both modern and fun.
Gabbie Morgan, a YouTuber, shares her way of creating acrylic nail designs with a pink glitter ombré effect at home. She guides viewers through each step, from prepping her nails to applying acrylic and adding the ombre effect. In the video she said, “I really really love them, its super super cute and pretty ( i ).”
The pink ombré nail ideas above provide the best inspiration for you to explore the different shades of pink. However, it is important to remember that certain things must be kept in mind to ensure that your manicure is the best one for you. To know more, take a look at the following section.
How To Choose Pink Ombré Nail Styles
While pink ombré nails might look extremely pretty and chic, there are some things that you must keep in mind before getting them done for yourself. When selecting pink ombré nail styles, consider the following:
- Occasion: Opt for subtle shades like baby pink for formal events, and vibrant pinks for a playful or casual look.
- Nail Shape: Opt for long stiletto nails for added drama, or short square nails for a classic touch.
- Skin Tone: Warm undertones complement coral pinks, while cooler tones pair well with bubblegum or pastel pinks.
- Trends: Stay informed about current trends, but prioritize what resonates with your style.
- Personal Preferences: Experiment with various shades and gradients to find the perfect balance that suits your taste and gives you confidence.
- Versatility: Consider shades that can seamlessly transition from day to night, providing versatility in your nail styles.
Infographic: 8 Stunning Combinations For Pink Ombré Nails
Looking for the perfect pink shade for your ombré nails? Now that you have so many stunning variations and design options, making this choice can be a little tough. While all pink shades are beautiful, it is important to pick the perfect ones for that seamless gradient effect. The infographic below lists 8 versatile pink shades that pair beautifully with complementary colors to create stunning gradient effects. This guide will help you find the perfect pink combinations for your next manicure. Check it out!
Are there seasonal variations for pink ombré nails?
Yes, you may opt for lighter pinks and pastels for spring, while vibrant and neon pinks shine in summer. Warm coral tones look beautiful in fall, and deeper, muted pinks feel cozy in winter.
How long does ombré nail art last?
An ombré nail art may last 2-4 weeks if you follow a proper nail care routine. The longevity of ombré nail art also depends on factors like product quality and daily activities.
Learn how to do a French fade from the comfort of your home. Discover the step-by-step process and save some bucks by not going to the salon. Check out the video now!
Personal Experience: Source
StyleCraze’s articles are interwoven with authentic personal narratives that provide depth and resonance to our content. Below are the sources of the personal accounts referenced in this article.
(i). Watch Me Do My Own Acrylic Nails! | Pink Glitter Ombre Tutorial https://www.youtube.com/watch?v=Usb2JCA5tdo
Community Experiences
Join the conversation and become a part of our empowering community! Share your stories, experiences, and insights to connect with other beauty, lifestyle, and health enthusiasts.


